Wednesday 31 December 2014

Happy 2015

Well, 2015 is almost upon us and I'd like to wish my reader a Happy New Year!

Actually, I'm being a little hard on myself: Karmic Odyssey gets read by people from all over the world and has had over fifteen thousand page loads over the last five years: not earth shattering I know, but I hope that at least some of what readers found here was useful.

As for the new year, the HTPC will be my next project - cash be damned! I'm also hoping that the Ubuntu phone really will make an appearance in February. Whatever you find yourself doing and wherever life takes you in 2015, I hope that the World will be kind to you and that you have a happy and prosperous time.

See you all on the other side :)

Sources & References:

  • None

Wednesday 24 December 2014

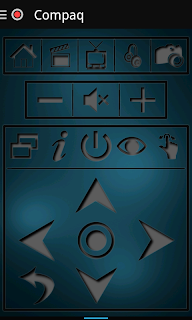
Setting Up the XBMC Remote On Your Android Smartphone

In my post describing how to set up a Yatse remote on your Android smartphone, I opined that the Kodi/XBMC offering was a little trickier to set up. Nonetheless, I've found persevering with the setup to be a worthwhile experience and, despite some minor shortcomings, I've found that the XBMC remote is more reliable on my Samsung Galaxy Advance than Yatse.

In order to control Kodi/XBMC via any remote control, you must first make some adjustments to the host machine. The following instructions are taken from my setup using 13.2 Gotham & my Samsung Galaxy Advance (as the remote):

  1. Start Kodi/XBMC, navigate to SYSTEM and select Services
  2. Select the Webserver menu option:
    • Check the Allow control of XBMC via HTTP option
    • Set the - Port option to 8080 (this should be the default value)
    • The - Username & - Password options can be set to any value you choose (but you'll need to remember them)
    • Leave the - Web interface option as default.
  3. Select the Remote Control menu option:
    • Check the Allow programs on this system to control XBMC option
    • Check the Allow programs on other systems to control XBMC option
  4. Select the Zeroconf menu item and check the Announce these services to other systems via Zeroconf option.

Now we need to allow the remote control access to Kodi/XBMC (via HTTP) via the firewall (because you do have it enabled, don't you!). Both Yatse & the XBMC remote controls are web-based controls; that is, they send their commands via the local area network to the PC hosting Kodi/XBMC (as opposed to an IR or bluetooth remote). Open a terminal and do:

sudo ufw allow proto tcp from 192.168.1.0/24 to any port 8080 && sudo ufw allow proto udp from 192.168.1.0/24 to any port 9777

This is really two commands rolled into one. If you prefer, you can do each separately:

sudo ufw allow proto tcp from 192.168.1.0/24 to any port 8080

Followed by:

sudo ufw allow proto udp from 192.168.1.0/24 to any port 9777

Note, that you may need to change your IP range depending on your hardware. You can check that your firewall has updated its rules using:

sudo ufw status

And then restart your firewall (perhaps not entirely necessary) using:

sudo ufw reload

Now we can set up the remote! If you haven't already, download the XBMC remote from the Google Playstore.

  1. Start the XBMC remote app on your Android smartphone.
  2. From the app home screen, tap your phone's menu button and select Settings
  3. Tap Manage XBMC Hosts.
  4. Tap your phone's menu button and select Add Host.
  5. In the Add new host dialog:
    • Name of this instance: - anything that will identify your host. XBMC can manage multiple hosts, so this is simply a name that tells you which host you are connecting to.
    • Host or IP address: - I had no joy using host names - use your IP address. If you don't want to use ifconfig (from the terminal), from the Kodi/XMBC home screen select the System info sub-menu option from the System option and look under the Summary option.
    • HTTP API port: - leave this as the default 8080 (unless you've changed it for some reason)
    • Username: - You set this earlier (I did tell you to remember it!)
    • Password: - this is the password that you set for Kodi/XBMC and not your host password.
    • EventServer port: - leave as the default 9777 value (unless you've changed it for some reason
    • Leave all other settings at their default values and tap OK
  6. Tap your smartphone's back button
  7. Tap your smartphone's back button (yes, for a second time)

You should be able to connect to your host by tapping the smartphone's menu button & selecting Switch XBMC or from the right-hand applet on the XBMC remote's home screen.

On balance, I like the reliability and stability of the XBMC remote over Yatse, but Yatse is more configurable and looks great. In the end, this is a matter of user choice, but XBMC is free and there are no paid for upgrades.

Sources & References:

Wednesday 17 December 2014

Jogga's HTPC

Intended design of the HTPC (when I've saved enough money :)

Parts List

  1. CPU: AMD A6-5400K 3.6GHz Dual-Core Processor (£39.99 @ Amazon UK)
  2. Motherboard: ASRock FM2A88M-HD+ Micro ATX FM2+ Motherboard (£46.80 @ Amazon UK)
  3. Memory: G.Skill Ripjaws Series 4GB (2 x 2GB) DDR3-1333 Memory (£35.17 @ Amazon UK)
  4. Storage (Operating System & files): Kingston SSDNow V300 Series 60GB 2.5" Solid State Drive (£32.90 @ Amazon UK)
  5. Storage (Media): Western Digital WD Green 2TB 3.5" 5400RPM Internal Hard Drive (£59.90 @ Amazon UK)
  6. Case: Fractal Design Core 1100 MicroATX Mini Tower Case (£29.99 @ Amazon UK)
  7. Power Supply: Corsair Builder 500W 80+ Bronze Certified ATX Power Supply (£51.50 @ Amazon UK)
  8. Optical Drive: Samsung SH-224DB/BEBE DVD/CD Writer (£10.46 @ Aria PC)

Total: £306.71 (correct as of 17/12/14)

I'm living without a discrete graphics card (unless the build demonstrates a need to reconsider) and I'm recycling an existing TP-Link wireless card for networking. The speakers will probably be my existing DELL setup until I can afford a sound bar and I've already recycled a 1TB hdd from my busted NAS.

Control will be via my existing Logitech K400r wireless keyboard & my Samsung A3 advance smartphone.

The operating system will be Linux Mint 17 (obviously) although I have considered openelec. The media centre will be Kodi (formerly known as XBMC).

Criticism & advice welcome!

Sources & References:

Reconnecting With Your SSH Server after an Upgrade

I recently got around to updating my file server's operating system (from Mint 16 to Mint 17) and, in accordance with the law of unintended consequences, I found that I could no longer access my files using secure shell!

What I did get was an error message telling me that the host key verification [test had] failed. When you think about it, I should have anticipated the problem, after all, the original key was hashed under a different implementation of SSH Server as well as a different operating system! Fortunately, the fix is quite simple, particularly if you're only connecting to one host.

For a Single Host


Navigate to to the .ssh folder in the home/username directory (username will be unique to your circumstances). Remember that the period (full stop) indicates that this is a hidden folder, so you should ensure that you have the Show Hidden Files option enabled in your file browser. Delete the known_hosts file in the .ssh directory.

Now reconnect with your SSH host and a new key will be created following the usual warning that this is a new (and unknown!) host.

For Multiple Hosts

The error message will identify a line number in the know_hosts file; make a note of the number and open a terminal:

gksu gedit /home/username/.ssh/known_hosts

You will be prompted for your password. When the file is opened, delete the offending line, save the file and reconnect with your server. You should be prompted to recreate the key as if this were a first connection.

If you accidentally delete the wrong line (or the whole file, for that matter), fear not, the individual keys will be recreated when you next connect to your SSH server(s).

Sources & Resources:

  • None

Setting Up Yatse Remote Control for XBMC

My recent project to repair and consolidate my music library seems to have taken on a life of its own!

You may recall that back in September, my NAS failed leaving me with a spare 1TB hdd. Having fixed my music library, I decided to back-up my DVD library and build an HTPC around the redundant drive: it's taken months and I'm nowhere near finishing! Last night, the DELL Dimension, the DELL Inspiron, & the Compaq CQ60 were all backing-up movie files.

Designing a PC to fit around the drive has been fun, and I think that I can build a first-class rig for around £300 but money is a real issue at the moment and I've had to make compromises. One consideration is how to control the rig from my sofa: originally, I'd planned to use my Logitech K400r wireless keyboard (from my file server), saving myself a few quid on an IR remote control. However, on yesterday's RSS feed, Maximum PC did a piece on getting started with XBMC and I came across a reference to a smartphone app called Yatse XBMC also offers an official remote, which under test, is just as good but a little more difficult to set up.

Downloading and installing Yatse on your Android phone or tablet is simple (just head over to the Google Play Store & search for xbmc remote or Yatse), the basic app is free. However, getting the app to play nice with XBMC can be a little tricky! When you open the Yatse app, you should be prompted to add a server (called Host in Yatse). The nice thing with this app, is that the wizard does quite a lot of the work for you - you should only need to select the Host, add a username and a password (if you've enabled them in Kodi/XBMC. However, the setup may fail if you're running a firewall on your Linux box.

If you are running a firewall (and you should be!), you'll need to open a couple of ports for Yatse or XBMC Remote to work properly. Open a terminal and do:

sudo ufw allow proto tcp from 192.168.1.0/24 to any port 8080

Followed by:

sudo ufw allow proto udp from 192.168.1.0/24 to any port 9777

You may need to change the ip range to suit your router and, depending on your version of Kodi/XMBC, your tcp port. Unless you've done something very unusual on your system, the udp port should be left at the default value of 9777. In Kodi Gotham, you can check your tcp port under System > Settings > Services > Webserver, but I suspect that it will be a similar route in earlier versions.

Sources & References: